 EN

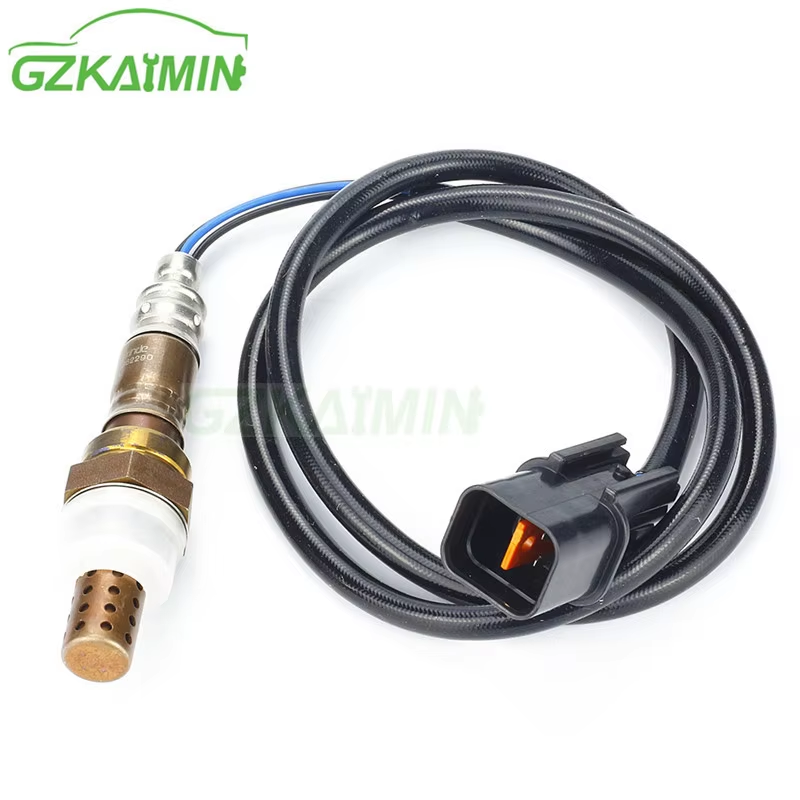
A failing O2 sensor (oxygen sensor) often hides behind vague engine complaints, and catching the warning signs early protects both engine performance and the catalytic converter. This guide explains how to judge whether the oxygen sensor has gone out of order by reading daily driving symptoms, scan-tool live data, and diagnostic trouble codes, then backs the method with a real workshop case. Ignoring the signs lets a rich mixture wash oil from cylinder walls and overheat the catalyst, raising repair cost far beyond a single part.
Driving Symptoms That Reveal a Failing Sensor
Rough Idle and Poor Throttle Response
When the oxygen sensor drifts out of range, the engine control unit receives wrong air-fuel ratio feedback and trims fuel incorrectly, which makes the motor shake at idle and hesitate during acceleration. A worn lambda probe typically switches too slowly or stays stuck near one voltage, so the powertrain control module cannot hold a stable mixture. Drivers notice stalling at traffic lights and a rough, uneven idle that worsens when the engine is cold. Left alone, the misfire risk grows and exhaust emissions climb.
Higher Fuel Use and Unusual Exhaust Smell
A faulty exhaust oxygen sensor often forces the system into open-loop rich running, raising fuel consumption by a noticeable margin that owners first see at the pump. The rich mixture leaves unburned fuel that smells like raw gasoline and produces dark smoke from the tailpipe. Combined with poor throttle response, this pattern points strongly toward a sensor that no longer reports the true oxygen content of the exhaust gas. The same rich condition also shortens catalyst life.
Confirming the Fault Through Codes and Live Data
Decoding OBD-II Diagnostic Trouble Codes
Modern vehicles follow the OBD-II standard referenced by SAE J1979, which stores diagnostic trouble codes when a sensor signal leaves the expected range. Common entries such as P0130 through P0161 mark a circuit or slow-response problem on a specific bank and sensor. Reading these codes with a basic scan tool gives a fast first clue, though a code alone does not prove which part failed, since damaged wiring, exhaust leaks, and vacuum faults also trigger the same entries. Cross-checking live data avoids wrong parts.
Reading Voltage Waveforms on a Scan Tool
A healthy heated oxygen sensor swings between roughly 0.1 V and 0.9 V several times per second. Technicians watch live short-term fuel trim and the voltage trace on a scanner to see whether switching still happens. When the trace flattens near a fixed value or crosses too slowly, the sensor has lost its ability to measure the oxygen difference between exhaust gas and outside air, confirming an oxygen sensor fault beyond doubt. A flat line near 0.45 V is the classic dead-sensor signature.
How a Lambda Sensor Works and Why It Fails
Switching Voltage and Rich-Lean Mixture Control
A zirconia oxygen sensor compares oxygen in hot exhaust gas with oxygen in outside air, generating a small voltage that rises when the mixture runs rich and drops when it runs lean. The engine control unit reads this signal and adjusts fuel trim to keep the air-fuel ratio near the ideal 14.7:1 point. Contamination from oil ash, coolant, or silicone poisons the ceramic element, so the sensor stops switching and the mixture drifts. Heat cracks and aged harness connectors add to the failure rate on high-mileage cars. A simple bench check measures the internal heater resistance, which normally falls between four and six ohms on a cool unit; an open circuit or a value far outside that band points to internal damage before the part is even installed.
Upstream Versus Downstream Sensor Roles
Most modern cars carry two sensors: an upstream oxygen sensor before the catalytic converter and a downstream sensor after it. The upstream unit controls the mixture, while the downstream unit checks whether the catalyst still cleans the exhaust. A failed upstream sensor hurts fuel economy and drivability first, whereas a weak downstream sensor usually lights the warning lamp without immediate running problems. Knowing the position helps target the correct replacement and prevents swapping a good part by mistake.
A Real Workshop Case and Maintenance Advice
Background, Problem, and Repair Outcome
A 2012 family sedan arrived with a lit warning lamp, rough idle, and fuel use up by about 25 percent. The garage pulled code P0133 (slow response, bank 1) and watched the live trace stay flat near 0.45 V. After replacing the faulty oxygen sensor with a calibrated unit and clearing the code, idle smoothed, fuel trim returned to normal, and the owner reported noticeably lower fuel bills within a week. The case shows how symptoms plus data confirm the fault and avoid guessing.
Buy, Inspect, and Maintain Recommendations
Choose a sensor matched to the engine and harness connector, and verify heating-circuit resistance with a multimeter before fitting. Inspect the exhaust manifold and wiring for leaks or heat damage that can mimic a bad sensor. Clean threaded bosses, avoid silicone-based sealants near the element, and follow the service interval in the manual. Regular checks keep the air-fuel ratio correct and protect the catalytic converter from overheating. Buying from a trusted automotive sensor supplier reduces the risk of poor calibration. Replacing the part together with a fresh exhaust gasket prevents repeat leaks, and logging live data after the repair confirms that short-term and long-term fuel trim settle near zero, proving the new unit has restored correct closed-loop control.
Correct judgment starts with observable symptoms, moves to OBD-II codes and live voltage data, and ends with targeted replacement. A careful oxygen sensor check prevents wasted parts and keeps emissions within legal limits, while protecting engine health and fuel economy for the long term. Pairing driver experience with instrument readings remains the most reliable path to a confident diagnosis.
Frequently Asked Questions
Question
What symptoms indicate a failing lambda probe?
Answer: A failing lambda probe usually shows rough idle, hesitation on acceleration, and a lit warning lamp. Fuel consumption often climbs because the engine runs rich, and the exhaust may smell of raw gasoline with visible dark smoke. These signs appear slowly, so pairing them with scan-tool live data helps separate a worn component from ignition or fuel-injection faults that produce similar behavior before any parts are ordered.
Question
Why does a bad sensor raise fuel consumption?
Answer: A weak oxygen sensor sends a falsely lean signal, so the engine control unit adds extra fuel to protect the motor. That rich mixture burns more gasoline and raises consumption while overheating the catalytic converter. Because the unit cannot measure exhaust oxygen accurately, the air-fuel ratio stays wrong until the part is renewed. Testing voltage switching quickly reveals whether the sensor has lost its response and needs replacement.
Question
How does a scan tool confirm the fault?
Answer: A scan tool reads live voltage from the heated element and shows short-term fuel trim. A healthy unit switches several times per second between low and high values. When the trace stays flat or crosses too slowly, response has failed. Comparing upstream and downstream readings also shows whether the catalyst still works, giving clear proof before any parts are removed from the exhaust system during the repair.
Question
Can a sensor be cleaned instead of replaced?
Answer: Cleaning rarely restores a poisoned lambda probe because contamination embeds in the ceramic element where solvents cannot reach. Light soot on the tip can be removed, but silicone or oil-ash poisoning is permanent. Replacement with a matched, calibrated unit is the reliable fix. A quick resistance and waveform check confirms whether cleaning is worth attempting or whether a new part is required for correct operation.
Question
Which sensor position should be tested first?
Answer: Test the upstream sensor first because it controls the air-fuel ratio and causes rough running and high fuel use when faulty. The downstream unit mainly monitors the catalyst and rarely affects drivability directly. Reading both live waveforms shows which one has lost switching. Targeting the correct position avoids replacing a good part and shortens diagnostic time in the workshop while lowering total repair cost.